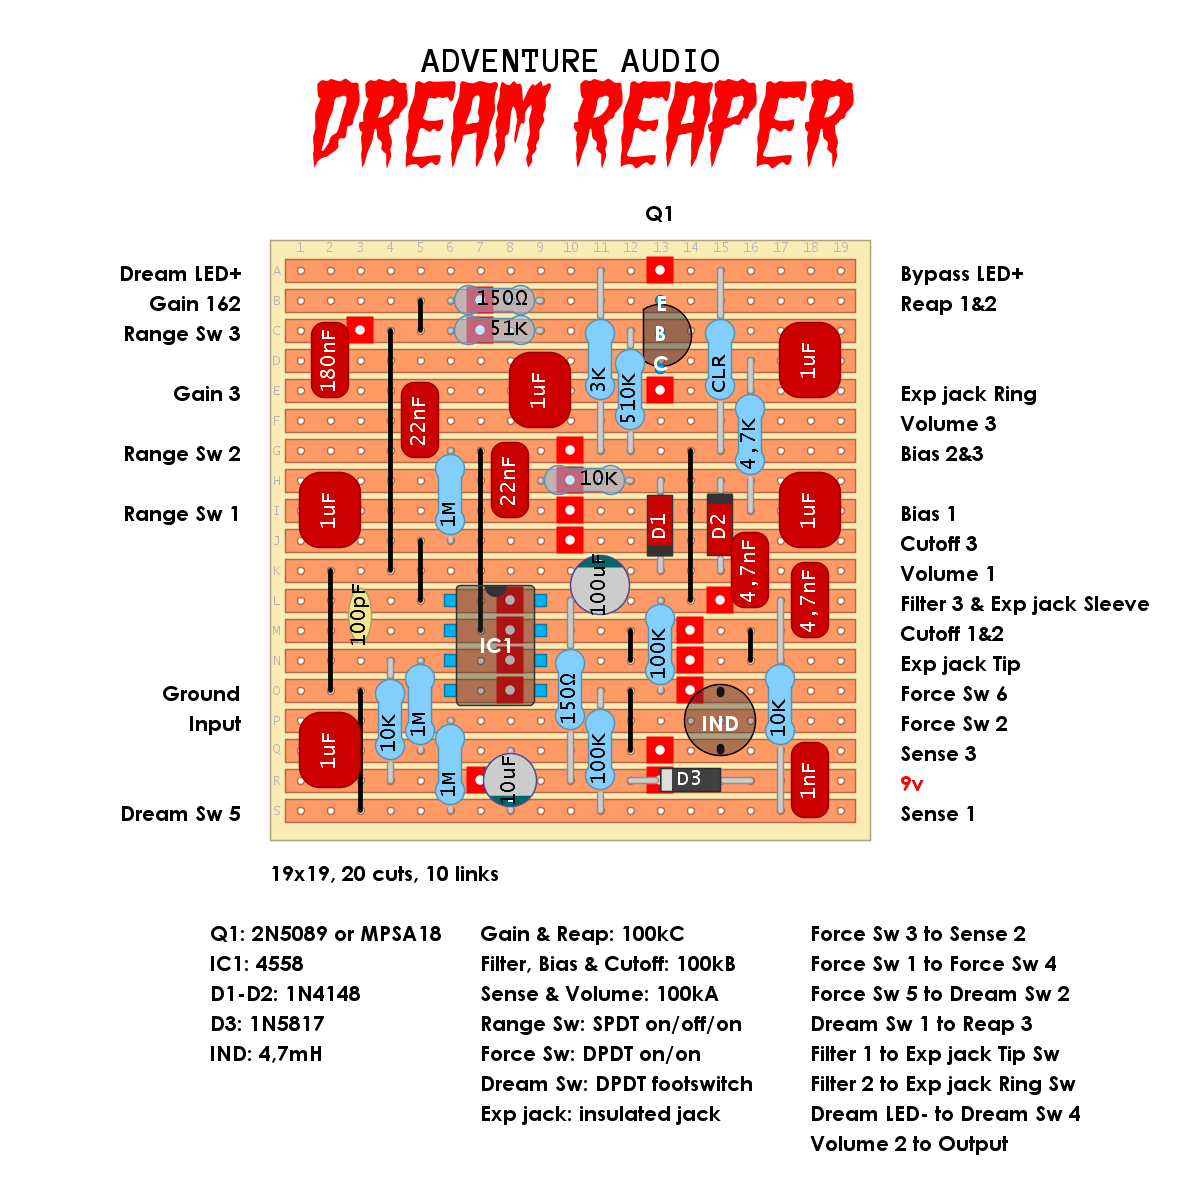
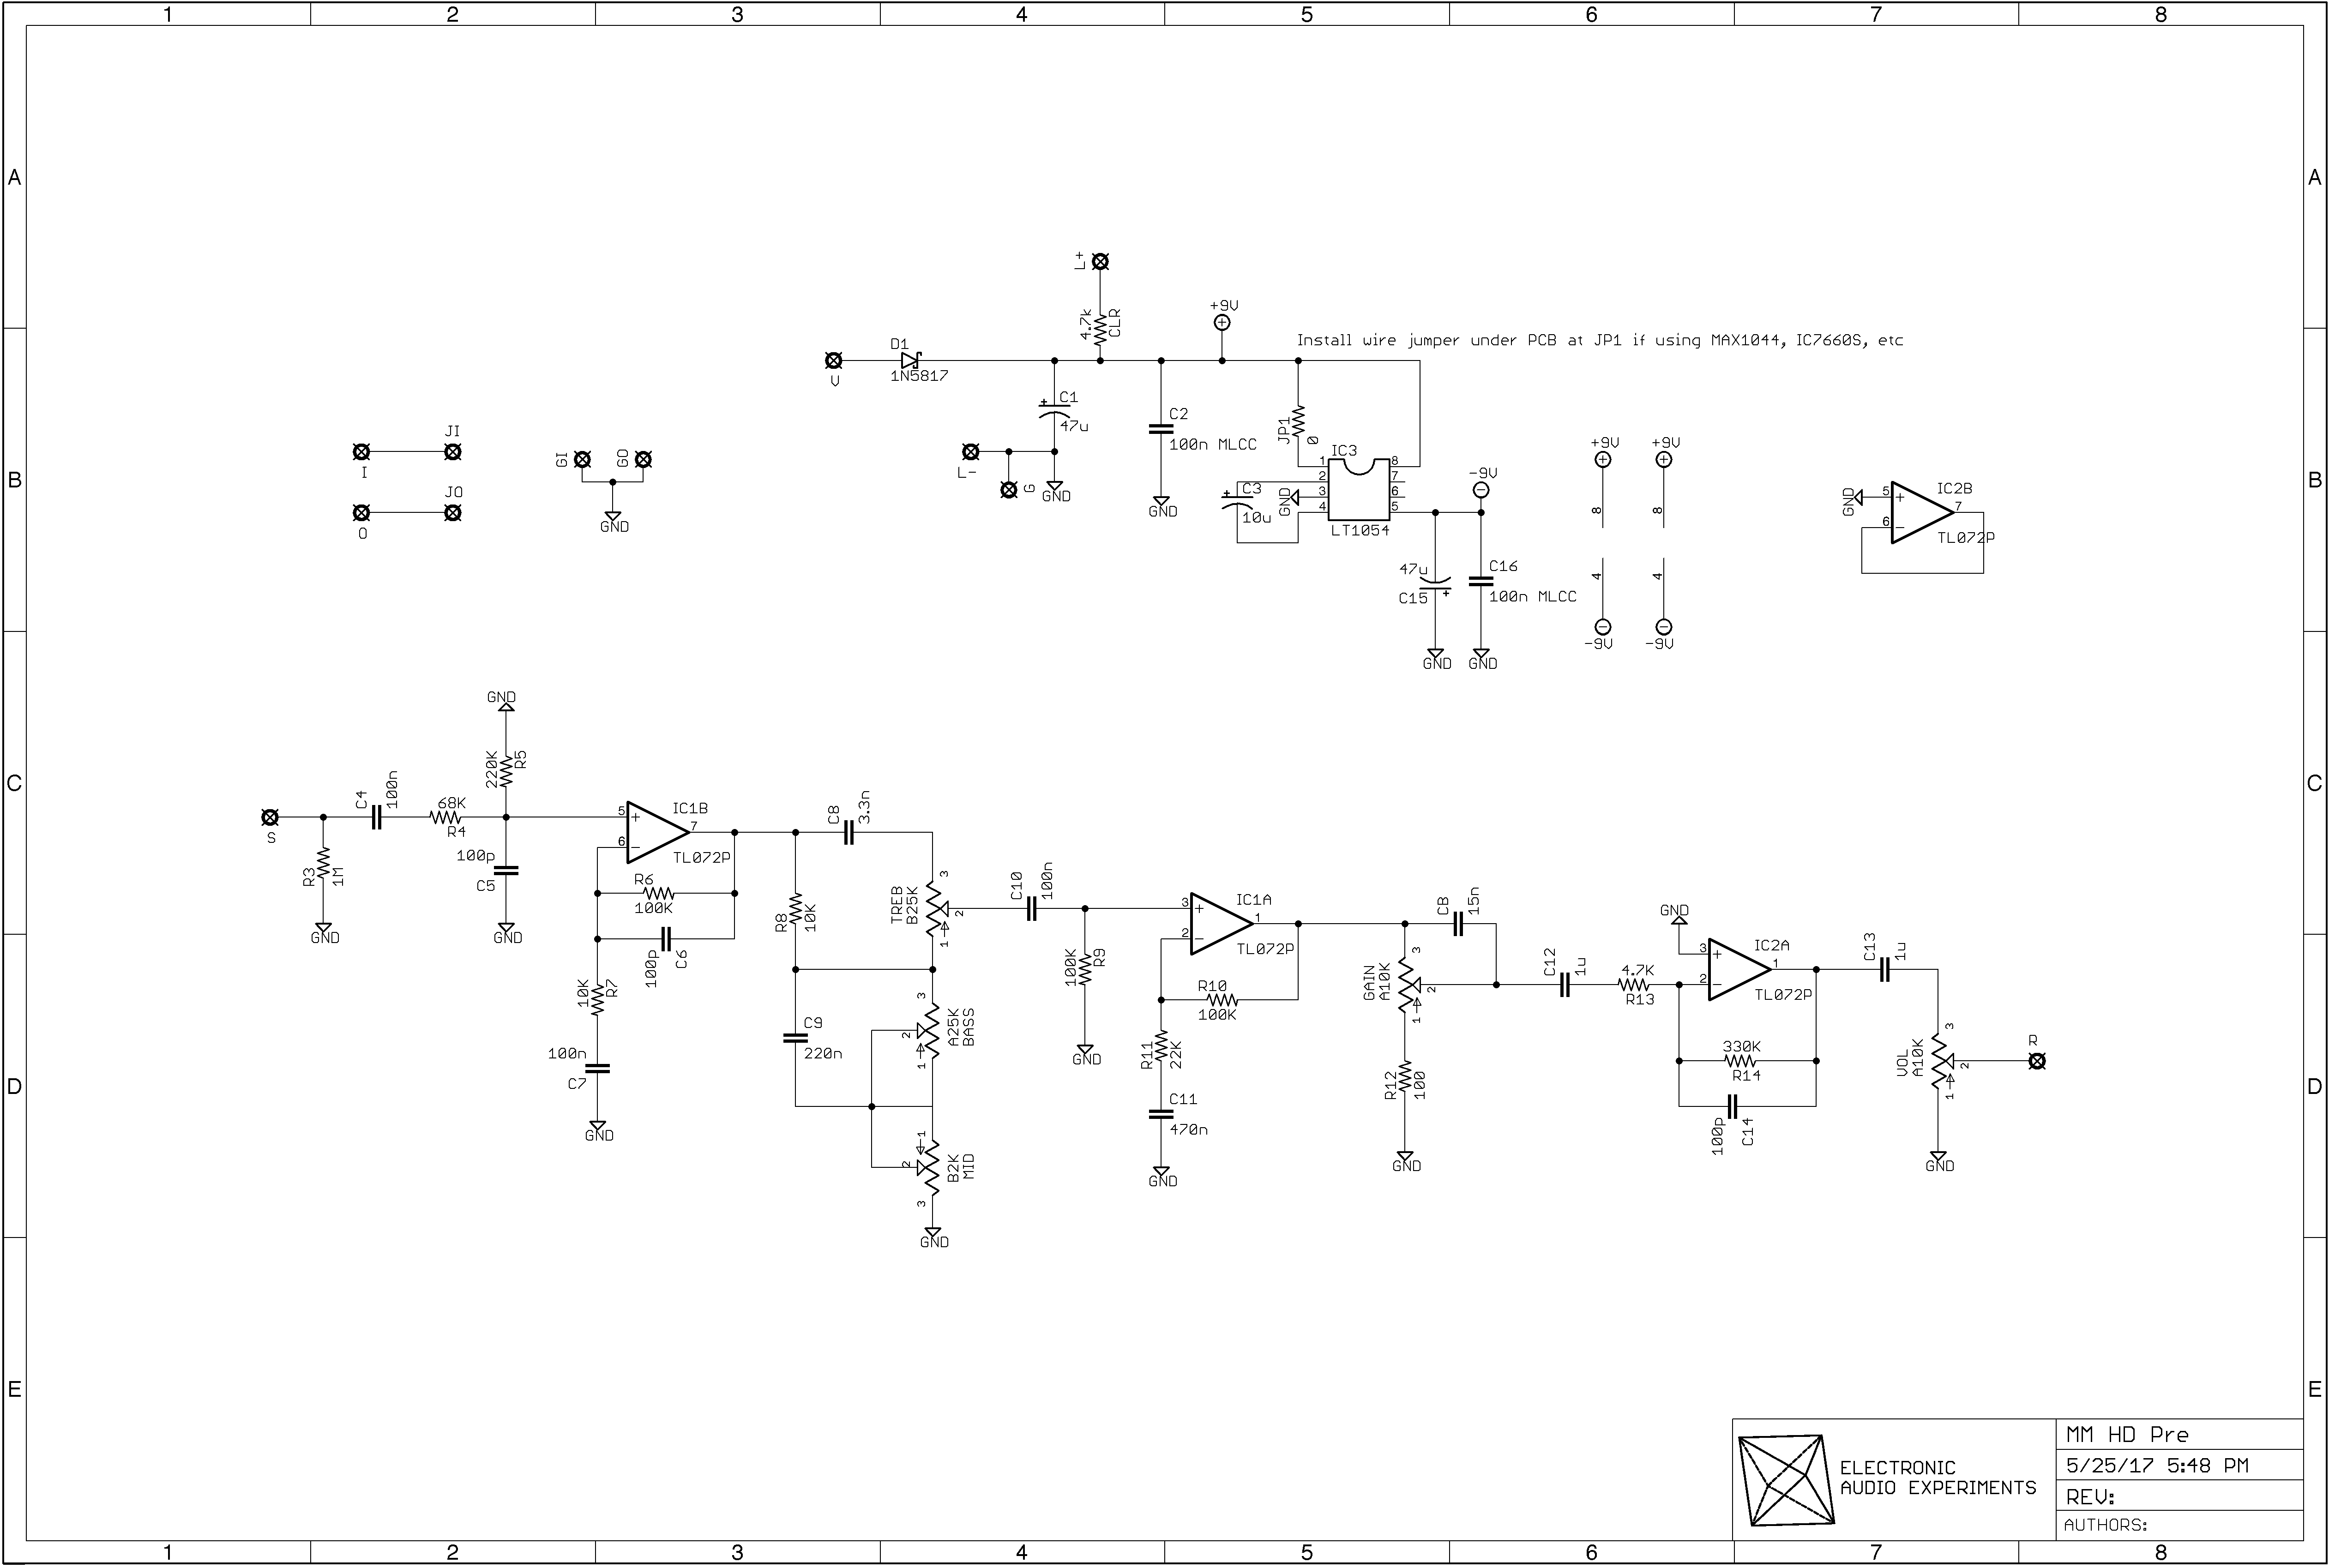
Schematic is aviable HERE.
Verified by NJGTR. Thanks mate! He also spotted some errors which now is corrected,

Schematic is aviable HERE.
Verified by NJGTR. Thanks mate! He also spotted some errors which now is corrected,
There was a request for 4ms Tremulues Lune with two LFO's but couldn't find a schematic for it. So we're stuck with the normal version. But for this layout I've incorporated an input buffer found in their "Luna" project. Schematic is aviable HERE as well different ways to wire up the rate LED and the bypass LED.

Per request.
This one was a PITA to draw with its four dual op amps and two buffered Vref lines. So it didn't came out 125b friendly and it has more links than I prefer...
Schematic is avaiable HERE.

Schematic is avaiable HERE.
*Edit 240216* wyongroadelelectroncs verified this layout. He also noticed that the Bass and Mid pot connections was is incorrect in the linked schematic. The Layout is updated and tagged.

Another layout and a dsign for those like it heavy by Chris at CDC Fx. No blurb from me, Chris does it better:
Things are rainy and depressing here in California. And also depressing
in the world, in general. So I've been drawing more layouts.
I was inspired by both the Dead Air Sawzall, and the layout another
Dirtbox user submitted to you under the name "Glass Jaw" - with a Bax EQ
in the middle of the two LM386 stages of the Acapulco Gold.
So I came up with a modified Acapulco Gold circuit with a better gain
control (instead of the common mod of a 1m pot on the input, this one
adds up to 10k of resistance between pins 1 & 8 of the 1st LM386)
and "sandwiched" (hence the name, hah) an HM-2-style EQ in the middle of
the two stages. I'm also running this at just under 18v with the
onboard charge pump. The result (I just built it, so it is verified!) is
a a pretty versatile amp-in-a-box with Sunn tonality and a switchable 3
band EQ! Not at all "chainsaw" but really cool sounding nonetheless!
The TO-92 18v regulator is probably unnecessary, since the TL082 can
handle more than that easily, but the LM386-4 is rated to max 18v and I
didn't want to risk damaging them.

A modified and improved Hornby Skewes silicon Zonk 2 that goes for big bucks.
Schematic and a breadboard session(!) is avaiable HERE.
It seems that silicon transistors in the 150-200 hFe range works best in this circuit.
*Update 240203* Reeves Electro got in touch with Gray Bench since two of the pot values was incorrect in the trace. Layout and schematic is updated.


Slightly modernized and improved. The original ran on negative power supply with low gain jellybean PNP silicon transistors with BCE pinout. This layout calls for low gain NPN silicon transistors with CBE pinots so you can easily socket the normal suspects like PN2222, 2N3903 etc. And a trimpot for the biasing the fuzz section replaces a fixed 10k resistor since original Skatterboxes was quite infamous for sounding misbiased in a bad way. And there is a spot for an optional smoothing cap across the base and colllector if the sonic character is too harch to some ears.
So what is this thing? Basically an early example of a multieffect. A silicon Zonk Mk.2 into a silicon treble booster.

A few months ago, Alex and I made an attempt to trace an old polish fuzz/distortion that looked incredibly cool and was supposed to sound in the vein of a Rat or a Big Muff. Soon, we realized that the circuit design was quite unique, not resembling anything else. It is basically a bootstrapped booster into a 741 op amp running way above full tilt for op amp clipping. An offset null trimpot is there to fine tune the gating and the sustain for the op amp. Then the signal goes into a BJT powered Baxandall tone section with the bass control fixed midway. The tone control is the Treble control in the Baxandall network.
So far so good but we failed just before the finish line...four of the resistor values was impossible to figure out so we pot it to bed. A few months later Blue Colander Stompboxes entered the scene.. They traced two Satronik units and posted a schematic on their DIY section of their website. That helped us fill in the missing gaps!
Note that several cap and resistor values varied through its lifespan as well as the transistor selection. The differences are quite minor so the sonic character shouldn't that far off from unit to unit. The values in the layout below are almost solely from AlexS and mine trace.


Another lovely contribution from Chris Stelloh! This layout VERIFIED by Chris himself so it is good to go. More info about this monster is avaiable HERE.
.png)